Managing form submissions
Your form submissions are stored on our servers. and are available to you in the Submissions section. This is where the information provided by your users is centralized so that you can get an overview of the submission status, analyze individual entries, and manipulate all data.
Each time a form is filled in and sent, a form submission is created. All entries received through a form can be found in Results → Submissions.

In this section, you are able to manage your form submission. Let’s take a look at what you can do.
- Edit a submission
- Print a submission
- Download as PDF
- Import/Export submissions
- Filter submissions
- Resend a submission
- Delete a submission
Editing a submission
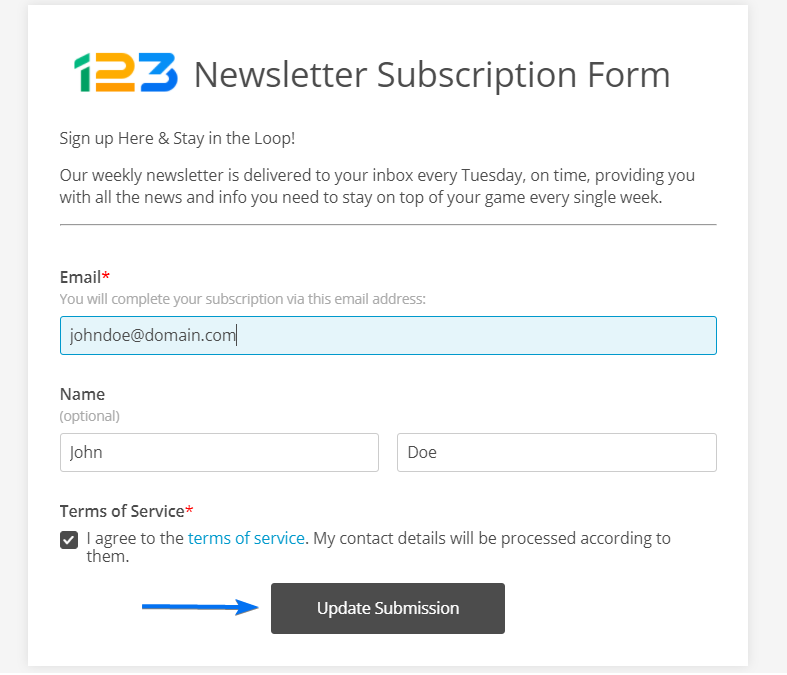
Sometimes you need to edit the submission to add additional information about a person’s entry. It could be details about their order or registration. To do so, click on the entry. A pop-up window will appear that contains all the information. At the top menu click on Edit.
Once you finish editing the entry, click on the Update Submission button.
Printing a submission
Click on an entry and select the Print button. This will open the printing options of your browser. Keep in mind that the printing options are depending on your browser.
Downloading as PDF
You have two options to download your submissions:
- As Plain PDF
- As Form Layout PDF
The first one has a default template. The second one will include the layout of the form, as seen online with the data included inside the form fields. For more details check out our PDF article here.
Import/Export submissions
To export the submissions table in Excel or CSV format, click Export to and select the format you need. Afterward, enter the email address where you want to receive the download link. You need to be logged in with your email address and your 123FormBuilder account in the same browser in two separate tabs. This is an authentification step to ensure that the request is made by the account owner.
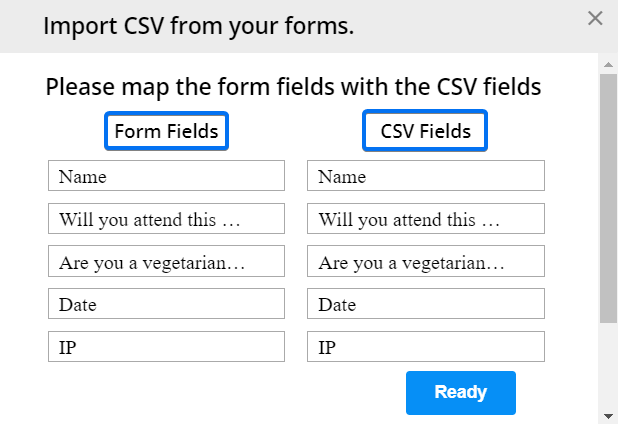
To import data, press the Import button. You can only import a CSV file in your forms Submissions section. The columns of your CSV file need to have the same name as your form fields. In the pop-up window, choose your CSV file. Afterward, map the form fields on the right side with your CSV fields on the left side. Once you’ve finished mapping them, click Ready and you’re done.
Filtering
Filter your submissions to display form entries that meet specific criteria. For more filtering operations click on Advanced Search.
In the Advanced section, you can choose which entries appear in the table, and which don’t by using the Show only and Exclude operators.

Resending
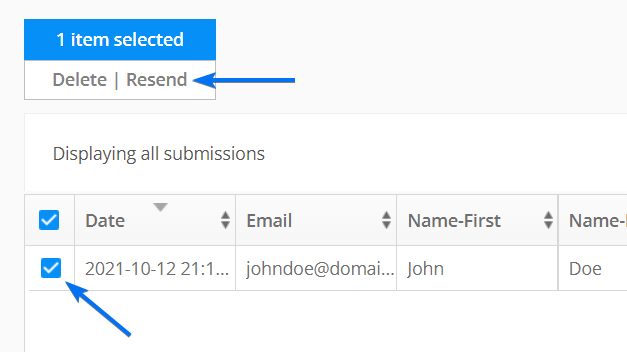
To resend a submission entry to your email box, click on the submission entry and press Resend. You can then choose to resend any of the Email templates created in your form’s Notifications section.
Deleting a submission
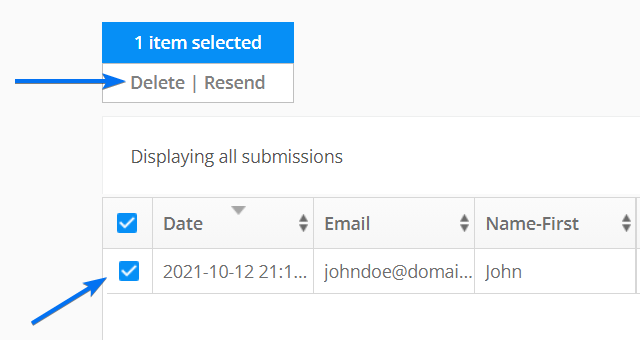
If you need to delete a submission, check the submission entry and select the Delete option.
Important Notes
- By deleting a form field in the Form Editor, all the data collected through that field will be lost and can not be recovered.
- We can restore deleted entries within 30 days since they have been erased. If you deleted an entry by mistake, feel free to contact us.
Related articles
16 comments
Leave a Reply
Your email address will not be published.
Similar Articles
Frequently Asked Questions
Here is a list of the most frequently asked questions. For more FAQs, please browse through the FAQs page.


Can I mark back unread a read item?
Hi! Currently, it is not possible to mark submissions with a “read” status as “unread.”
I’m creating a registration form for a music school. Is there a way to set a default in the submission process (submission PDF using Form Layout which I’m using) which EXCLUDES the “instructions” included on the form? It would be great if the instructions weren’t submitted and therefore NOT printed, which would save precious space on our form as we don’t require the instructions.
Hello!
The Submission PDF Form Layout is actually a screenshot of the form at the moment it was submitted. Unfortunately, it is not possible to make the instructions not visible for this format.
The workaround would be to use the Submission PDF which displays only the information entered in the fields, without any other details.
For further assistance, don’t hesitate to contact us at customercare@123formbuilder.com.
Thank you!
How do I approve submissions?
Hello Quentin! When using our approval feature, you will receive an email notification for each submission made on your form and at the bottom of the email, you will have two buttons, to either approve or reject the respective submission. If something is not working properly, please reach out to us at customercare@123formbuilder.com or on live chat so we can sort things out. Thank you!
Hi, Is there any way that I can set up an auto delete or auto removal for submissions older that a month so I can keep my basic plan and do not exceed the space assigned in your servers?
Thanks
Hi Ruben! I am afraid that we do not have this possibility. However, did you know that earlier this year we have redesigned our plans? Now all plans provide unlimited submissions, even the Basic free one. Please see our Features Matrix for more details. If you would like to migrate your account to the new plans, please contact us at customercare@123formbuilder.com. Have a wonderful day!
I didn’t ask for name or email address on a recent form I sent out. Is there a way to gather that info?
Hi Tina, since those fields weren’t on the form originally you will have to send the form link again to ask this new information. Thank you and have a great day!
I have some older forms that do not email me every time there is a submission but the newer forms i have made are filling my email, a copy is being sent to me every time a new submission is made. How do i get the new forms to not email me everytime?
Hi Christensen, could you please make a whitelist to mark us as a trusted sender. If this doesn’t solve the notification delivery, please contact us to check your form’s settings. Thank you and have a great day!
If I mark a form submission as read will it be marked as such for all users?
Yes, the mark as read feature applies to the form itself. This feature is not set for individual sessions because the marking is for the Form ID entries. Have a great day!
Can a form be sent to someone else in the organization? Automatically when it is completed by someone?
Hi Alexandra! Yes, go to Settings – Notifications and at the section called Recipients click on the New Recipient button. This is how it should be configured: Also send notification to ___ (type in the new email address) when All submissions. Click Add notification and save the changes. Now, the new recipient will also receive email alerts at each submission.