123FormBuilder Knowledge Base
Search our documentation platform for answers, service specifications and 3rd-party integrations.
How to create a complex order form?
Creating a complex order form with payment integration using our order form generator may initially seem a bit tricky. This article will guide you through every step, from adding the first field to having happy customers and money in your account.
Here is a complex order form that we’ve created for demonstration purposes. Even though it looks complex, it’s not that hard to build.
We will divide this tutorial into three parts: Form Editor, Field Rules, and Payments.
Form Editor
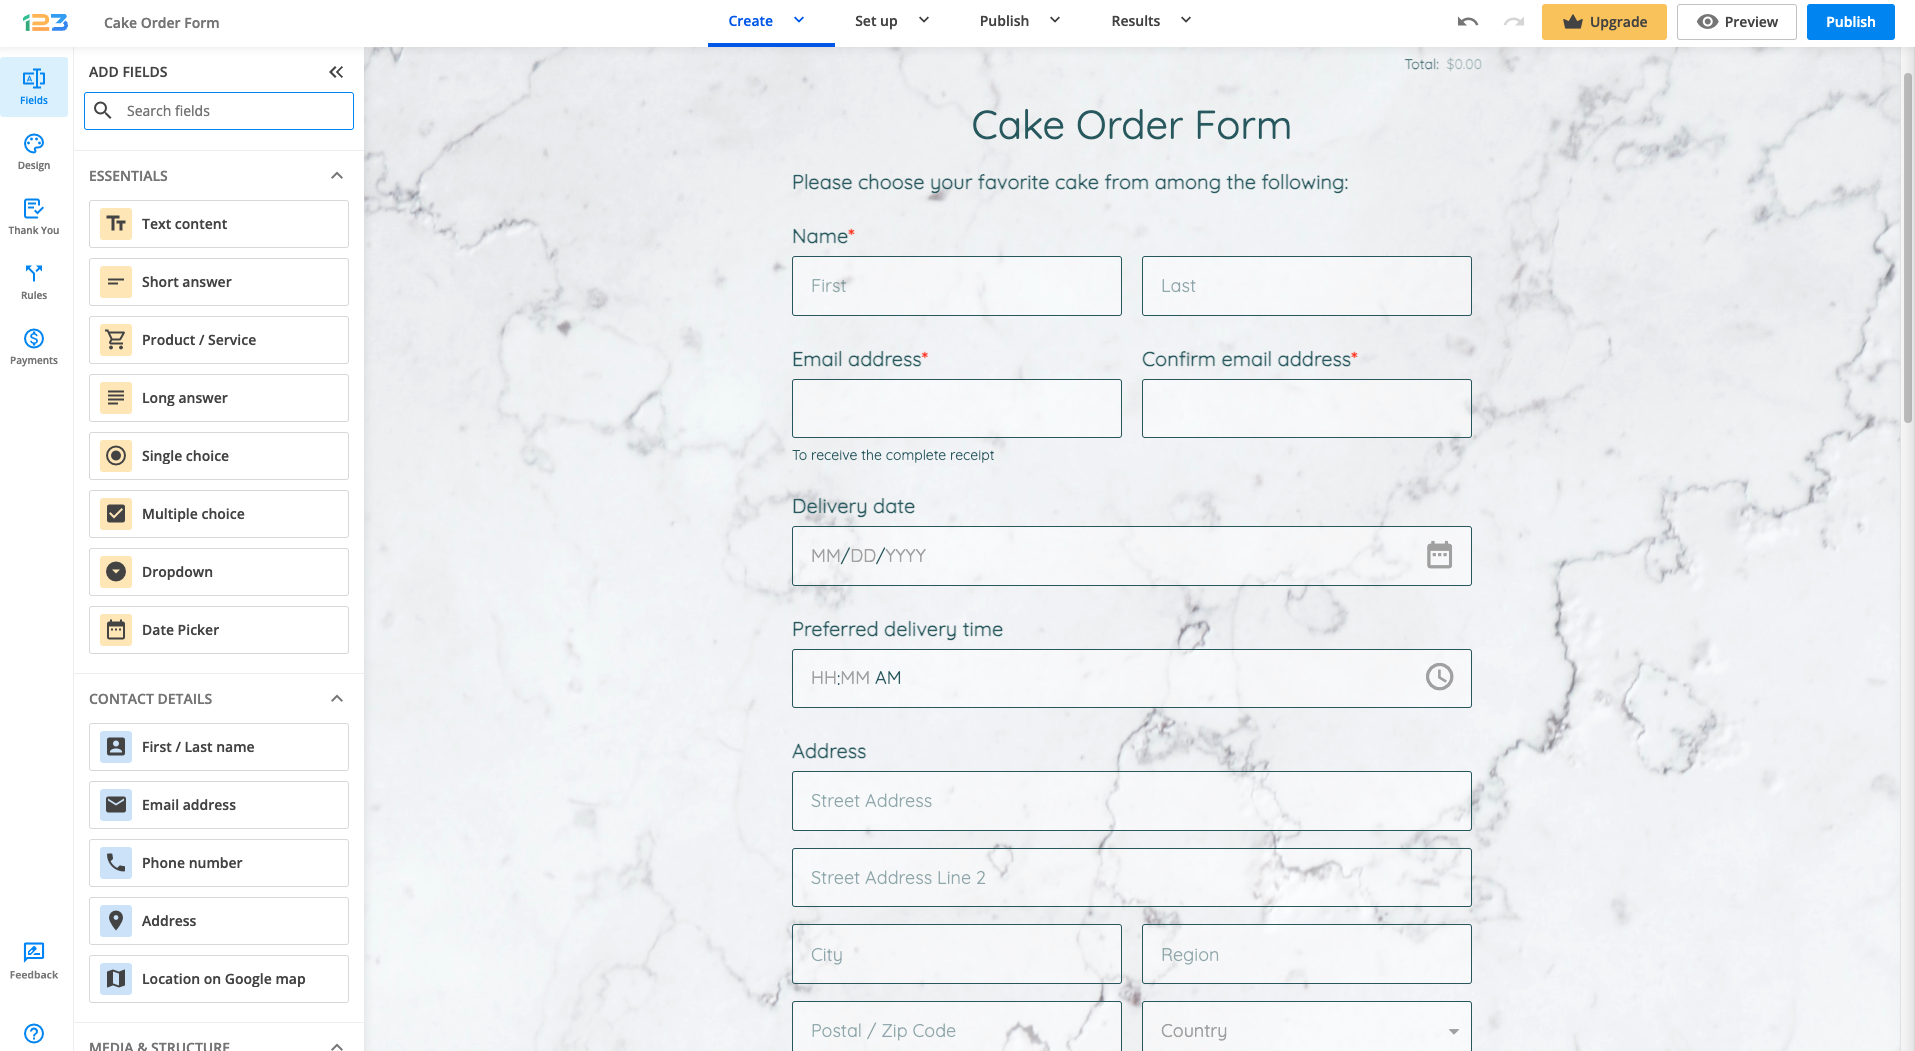
1. In the Form Editor of the form builder we will divide the form into three parts: contact and delivery details, menu and order confirmation, and terms of agreement. You can use divider fields in order to separate the section within your form.
2. The contact and delivery details section will contain fields with no special functions, whatsoever.
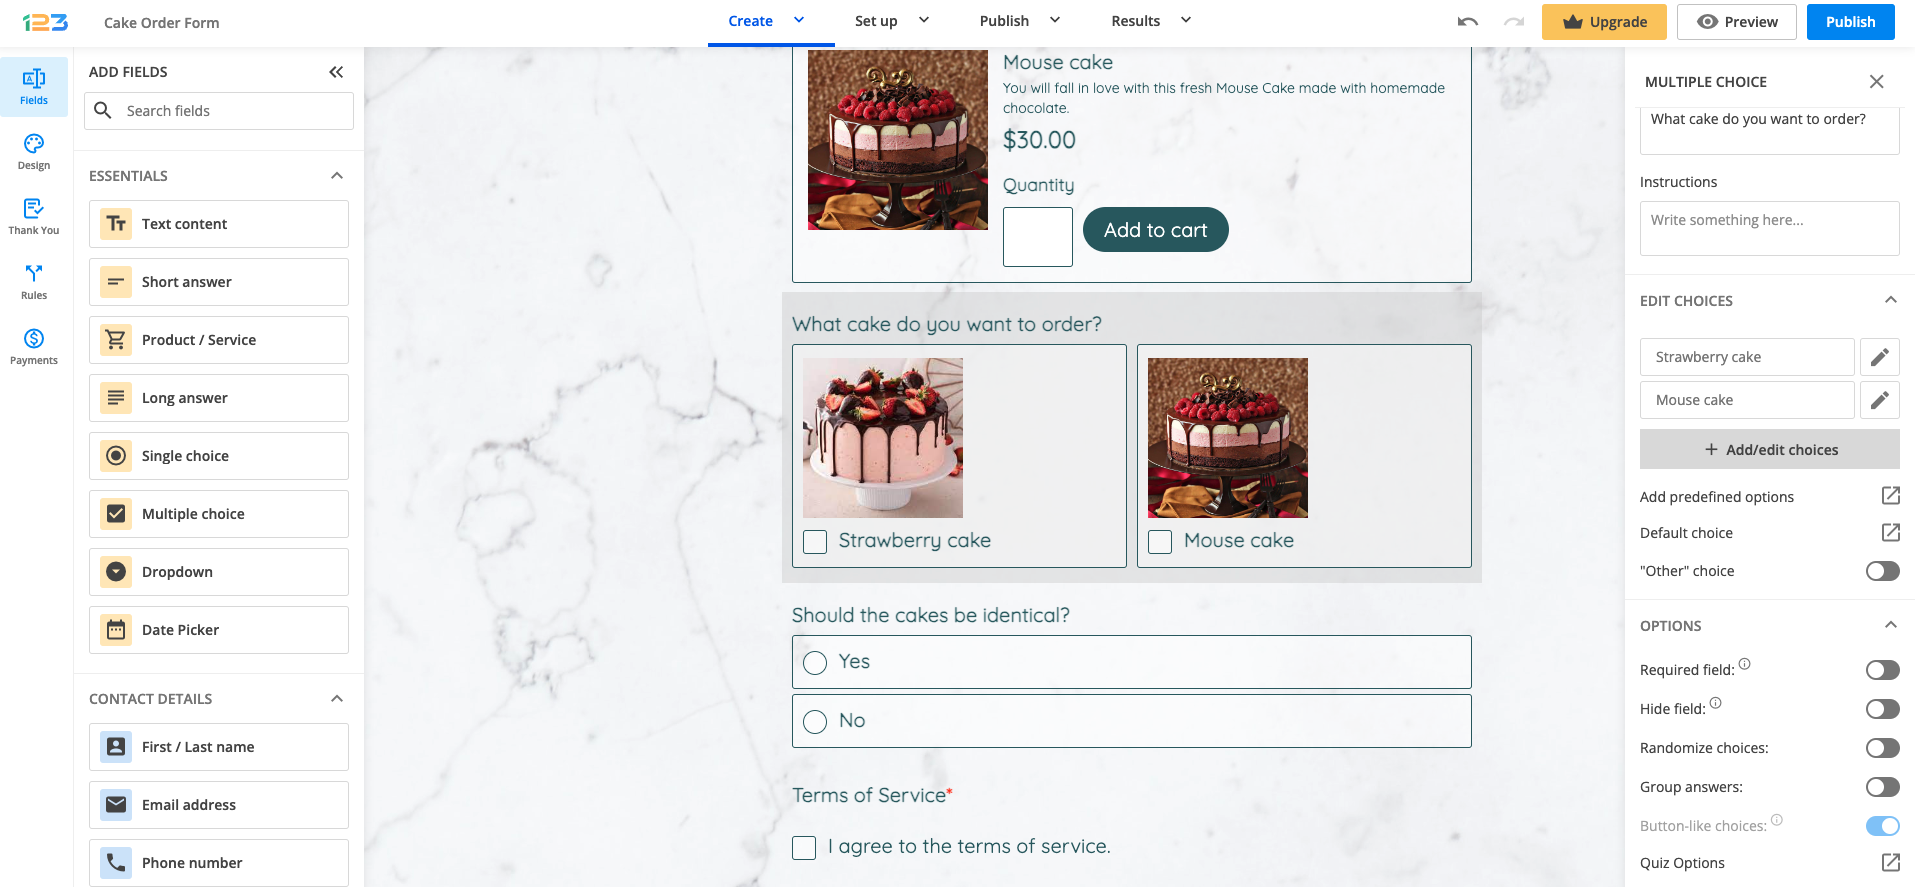
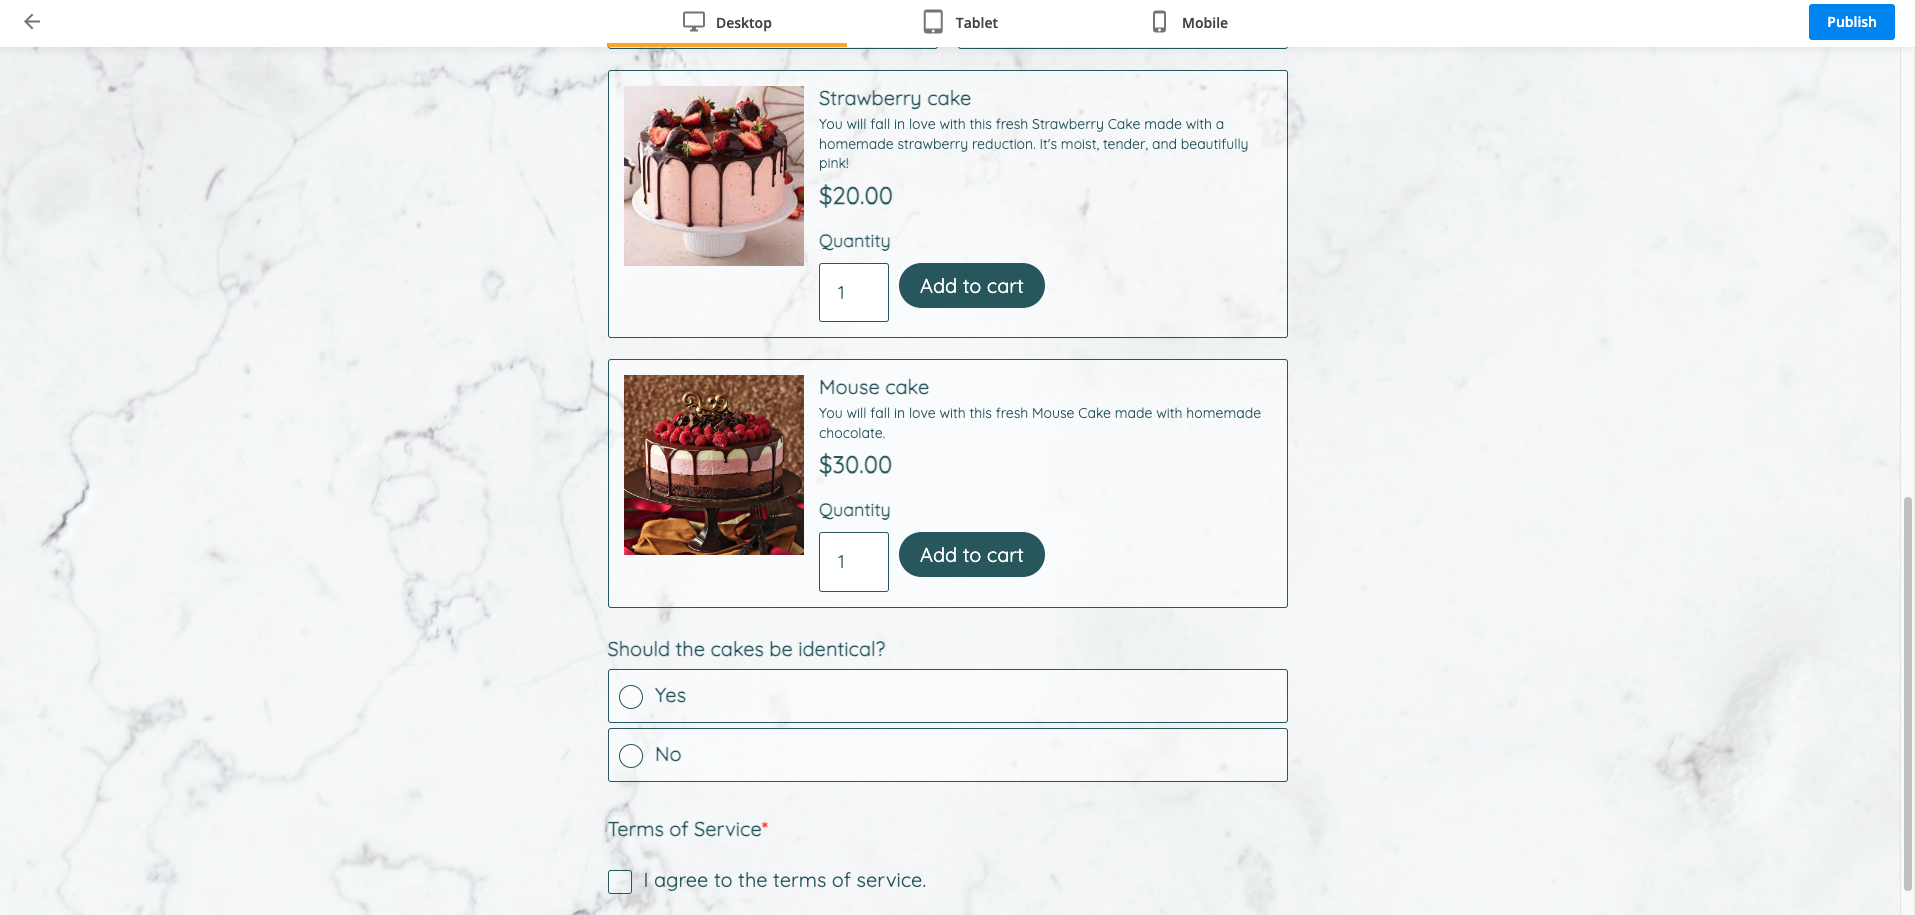
3. The menu is where we will add all fields that will sum the order. It might take a bit of time, but rest assured, it’s really not that hard. We are going to use Product field to display the menu. In our example, we have added 2 products – Strawberry cake & Mouse cake.
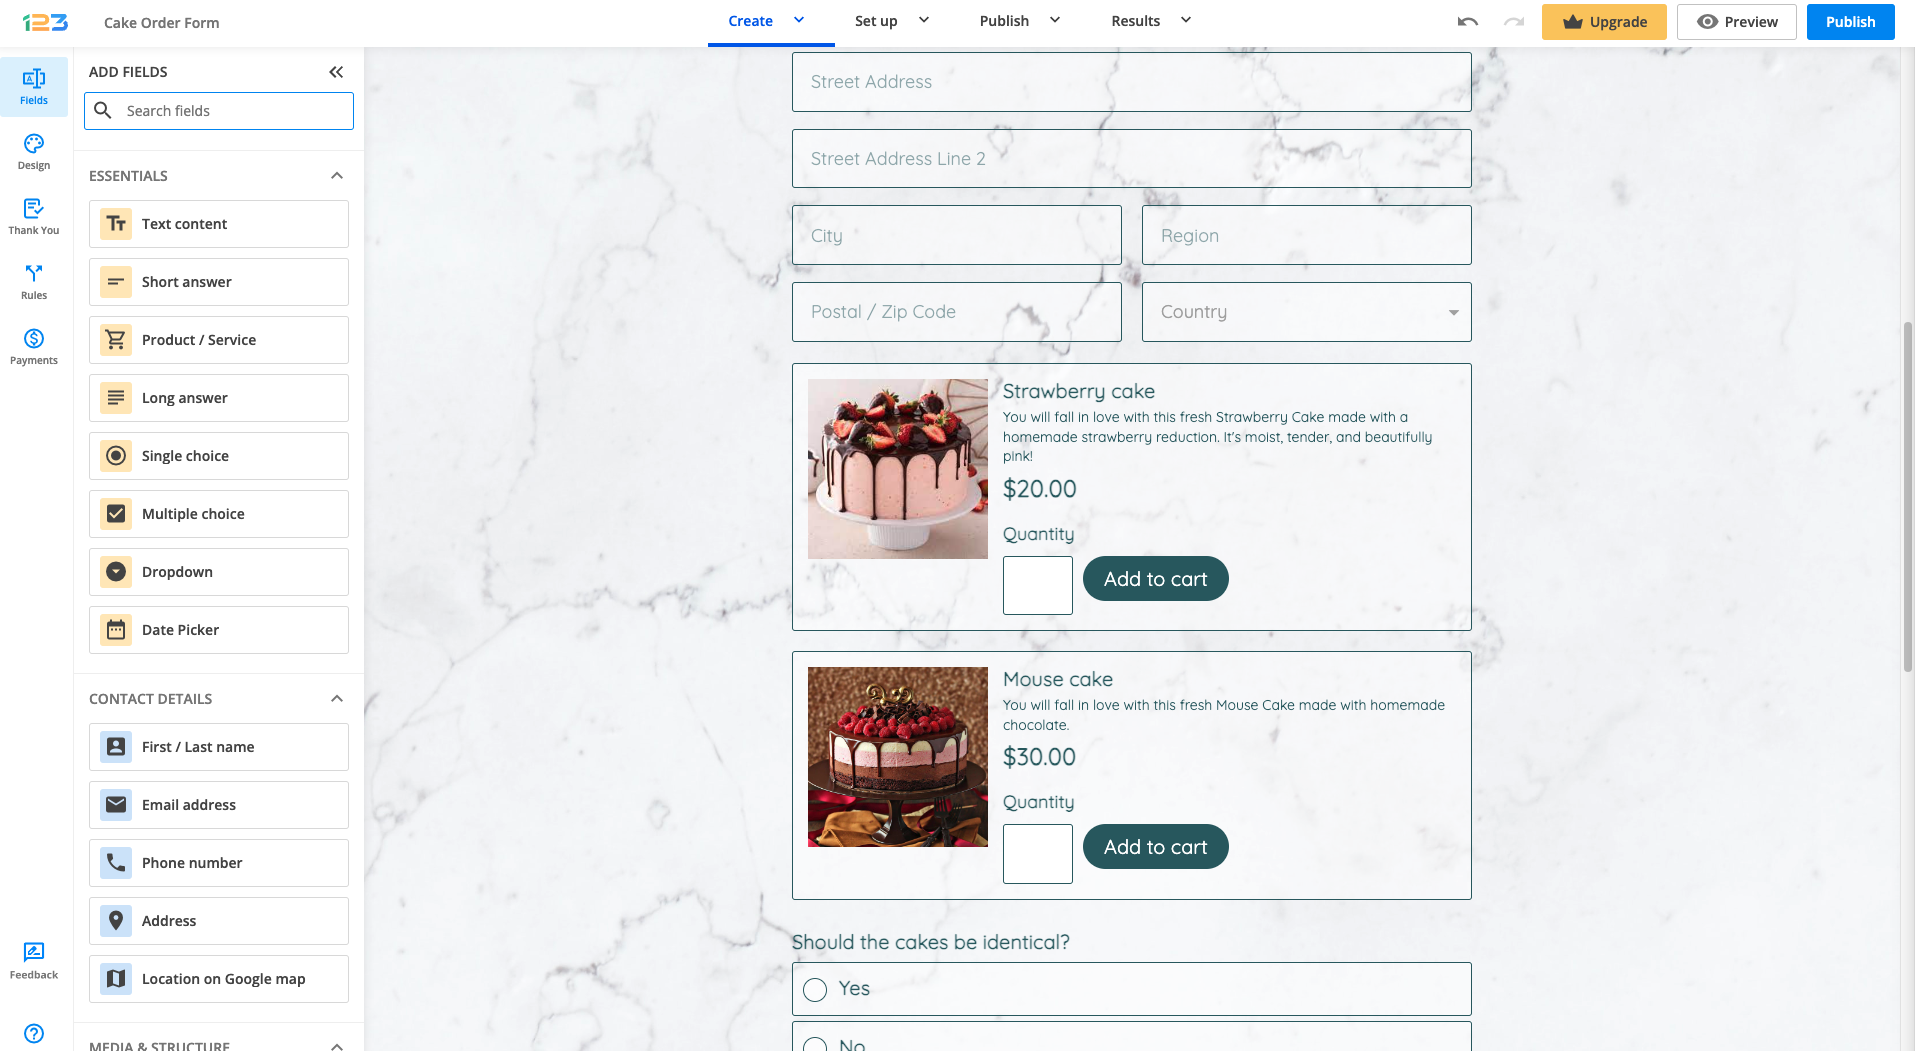
We’ve also added two questions that are related to the product that has been chosen by the respondents. Everything will make sense once you read the Field rules section.
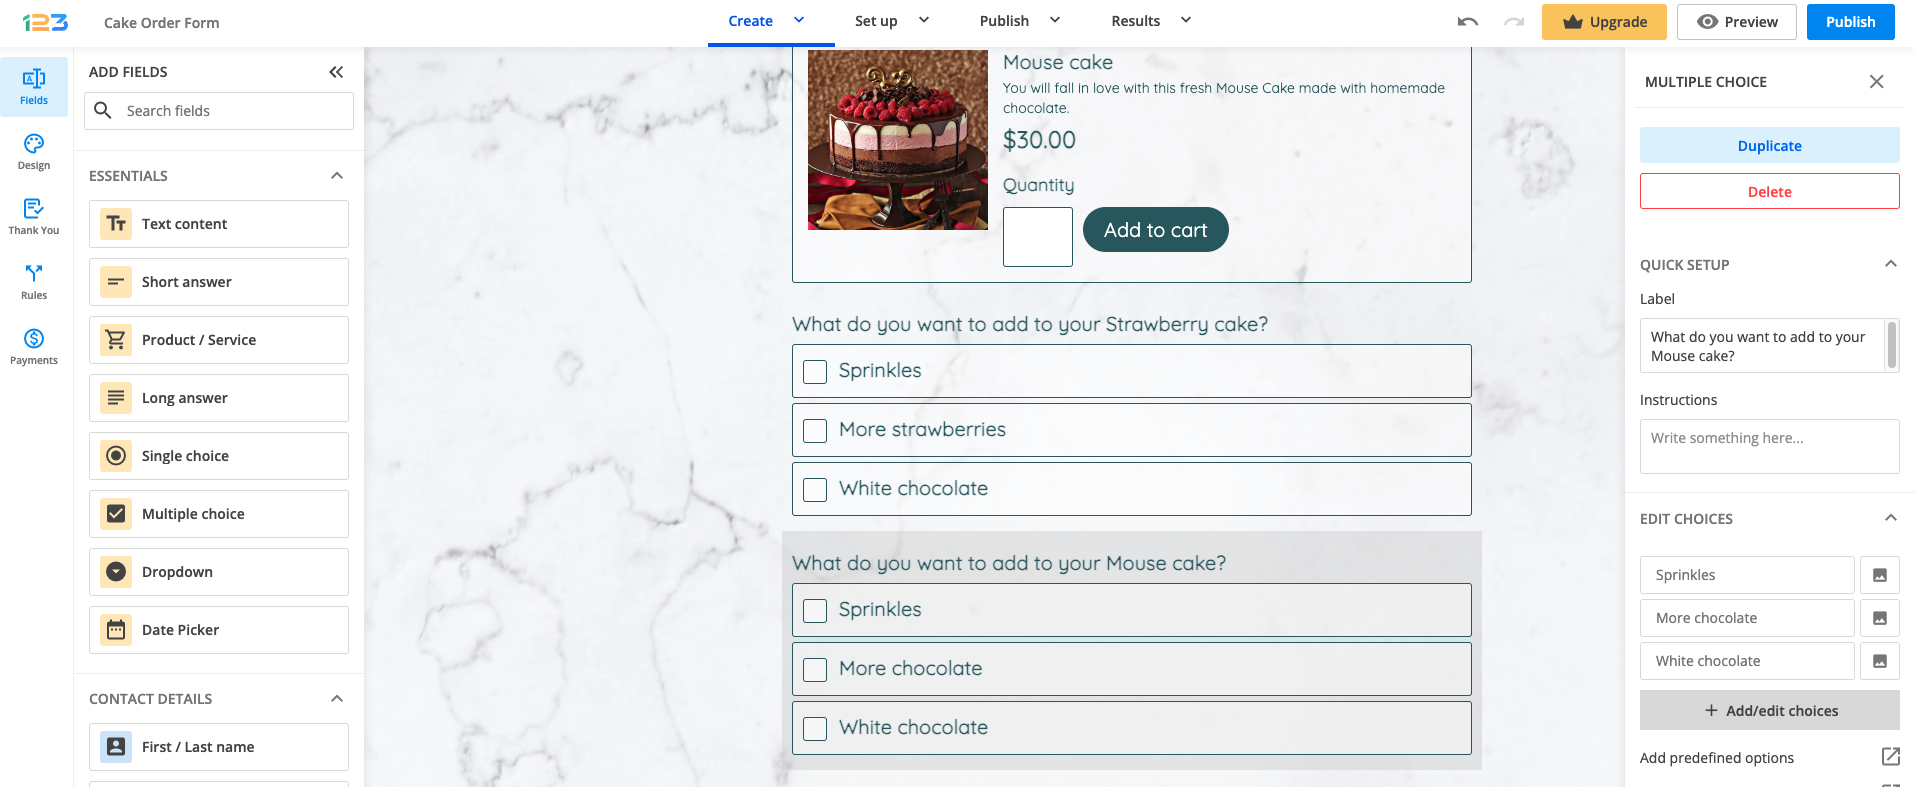
Note: if according to your pricing plan, you do not have access to Product field, you can achieve something similar by using Multiple choice fields. Also, you can add image to both choices.
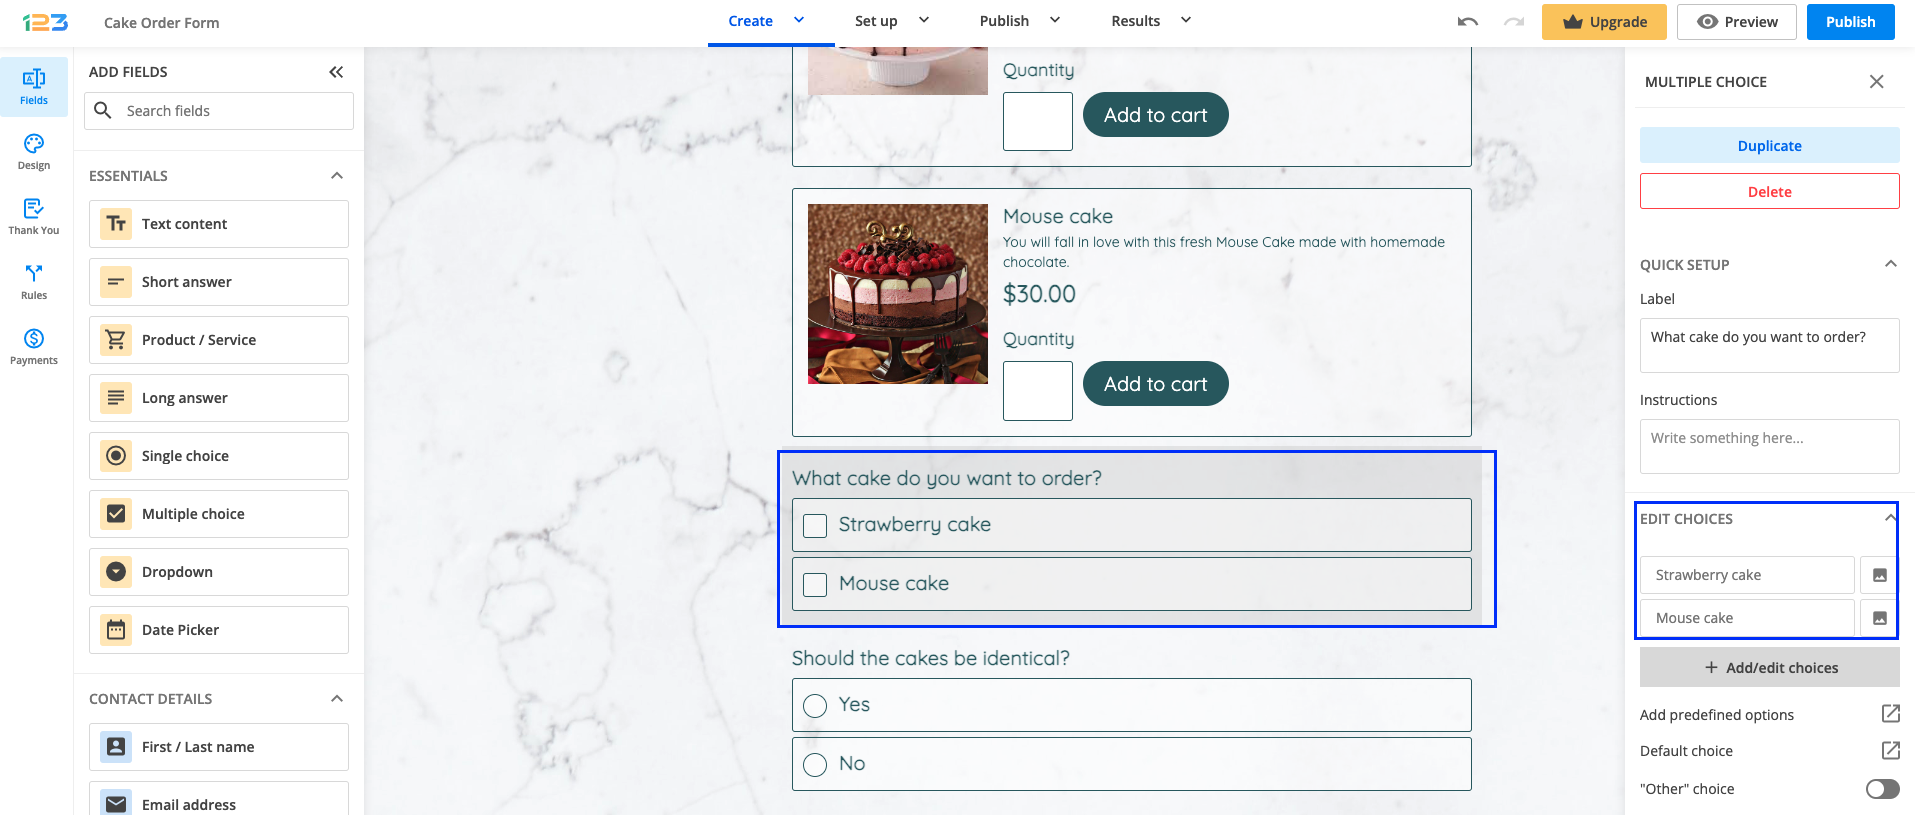
You just have to click on the image near the choice and upload the photos in the modal that has opened up.
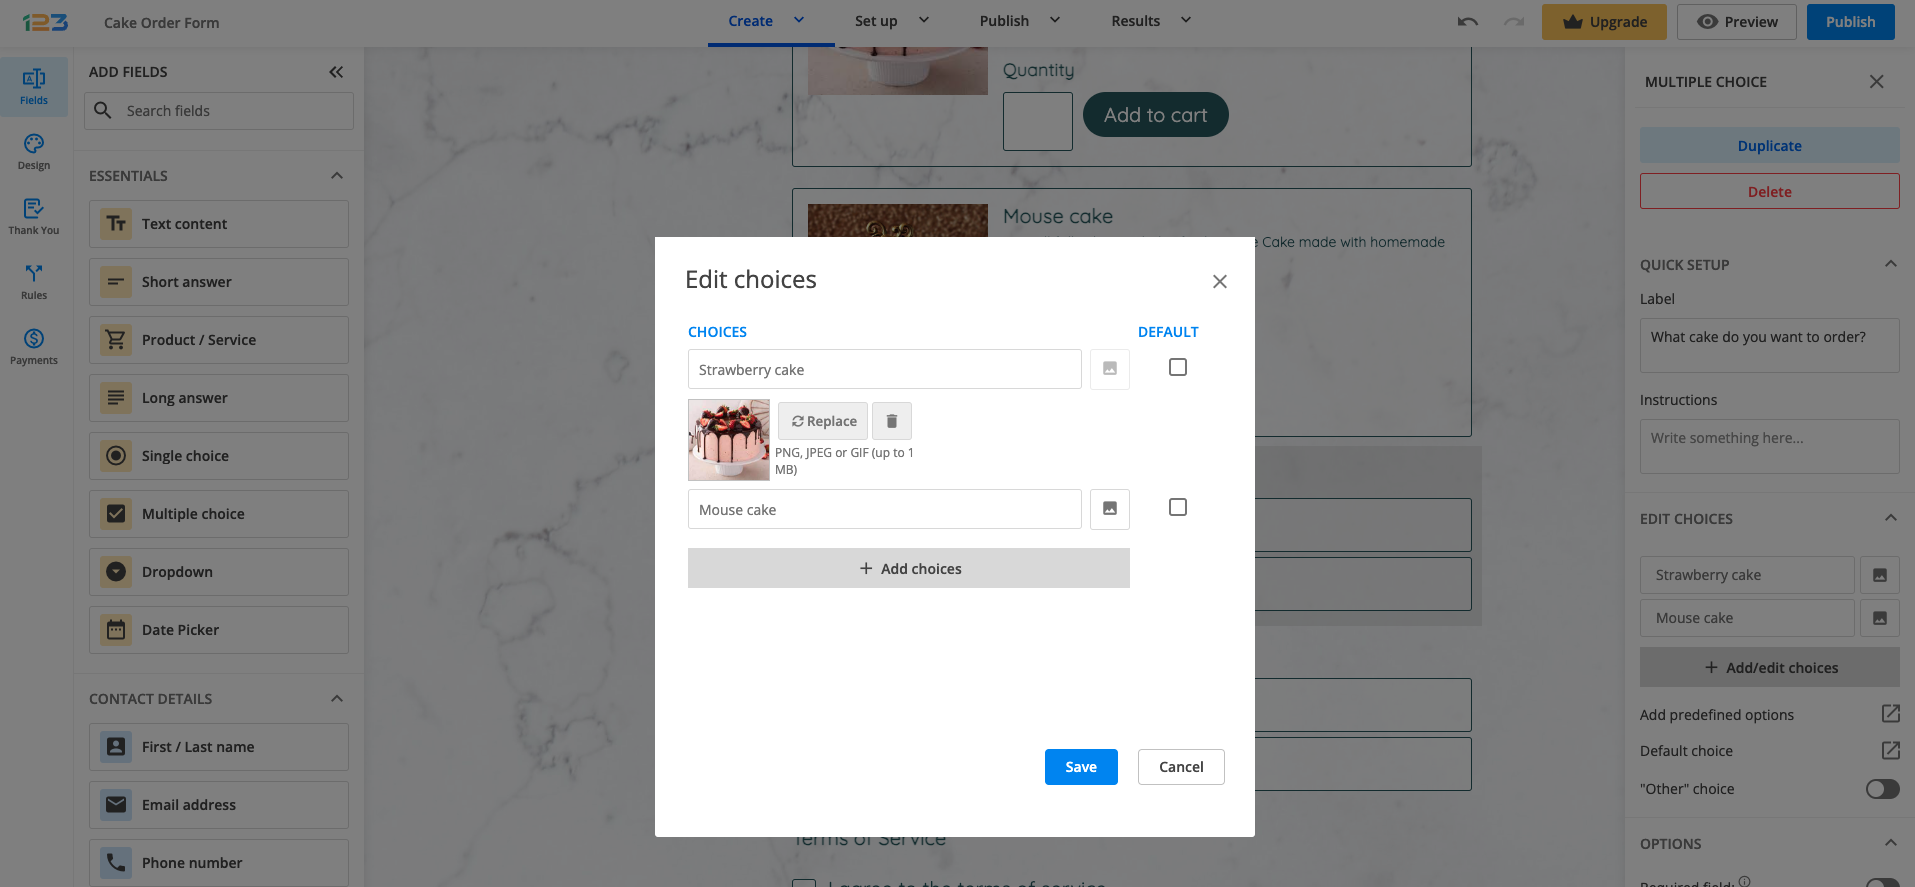
This is how it would look in the end when you have uploaded the images:
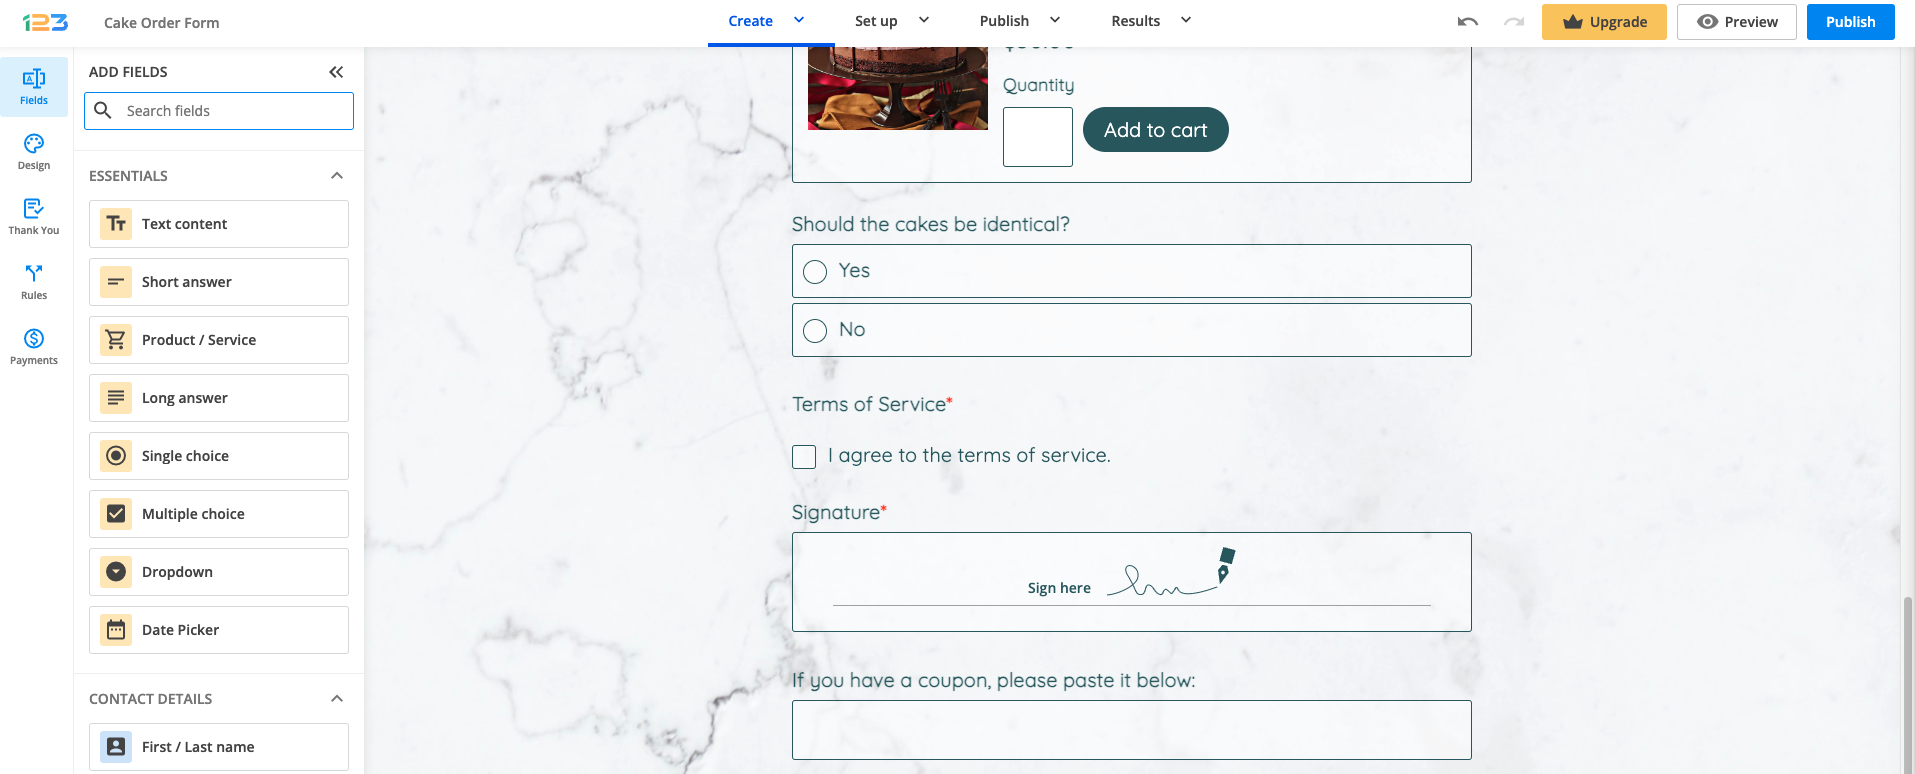
In the last section we will add a Signature field, a Terms of service field, and a Heading as an instruction to clients who have coupon codes to use for discounts.
Field Rules
Now that’s about it with the Form Editor, but we need to do something with those fields to appear only when the client selects one product or the other. The sample form provided earlier works something like this: when the respondent selects Strawberry cake, the field related to add-ons to the Strawberry cake appears. The same applies when they select Mouse cake.
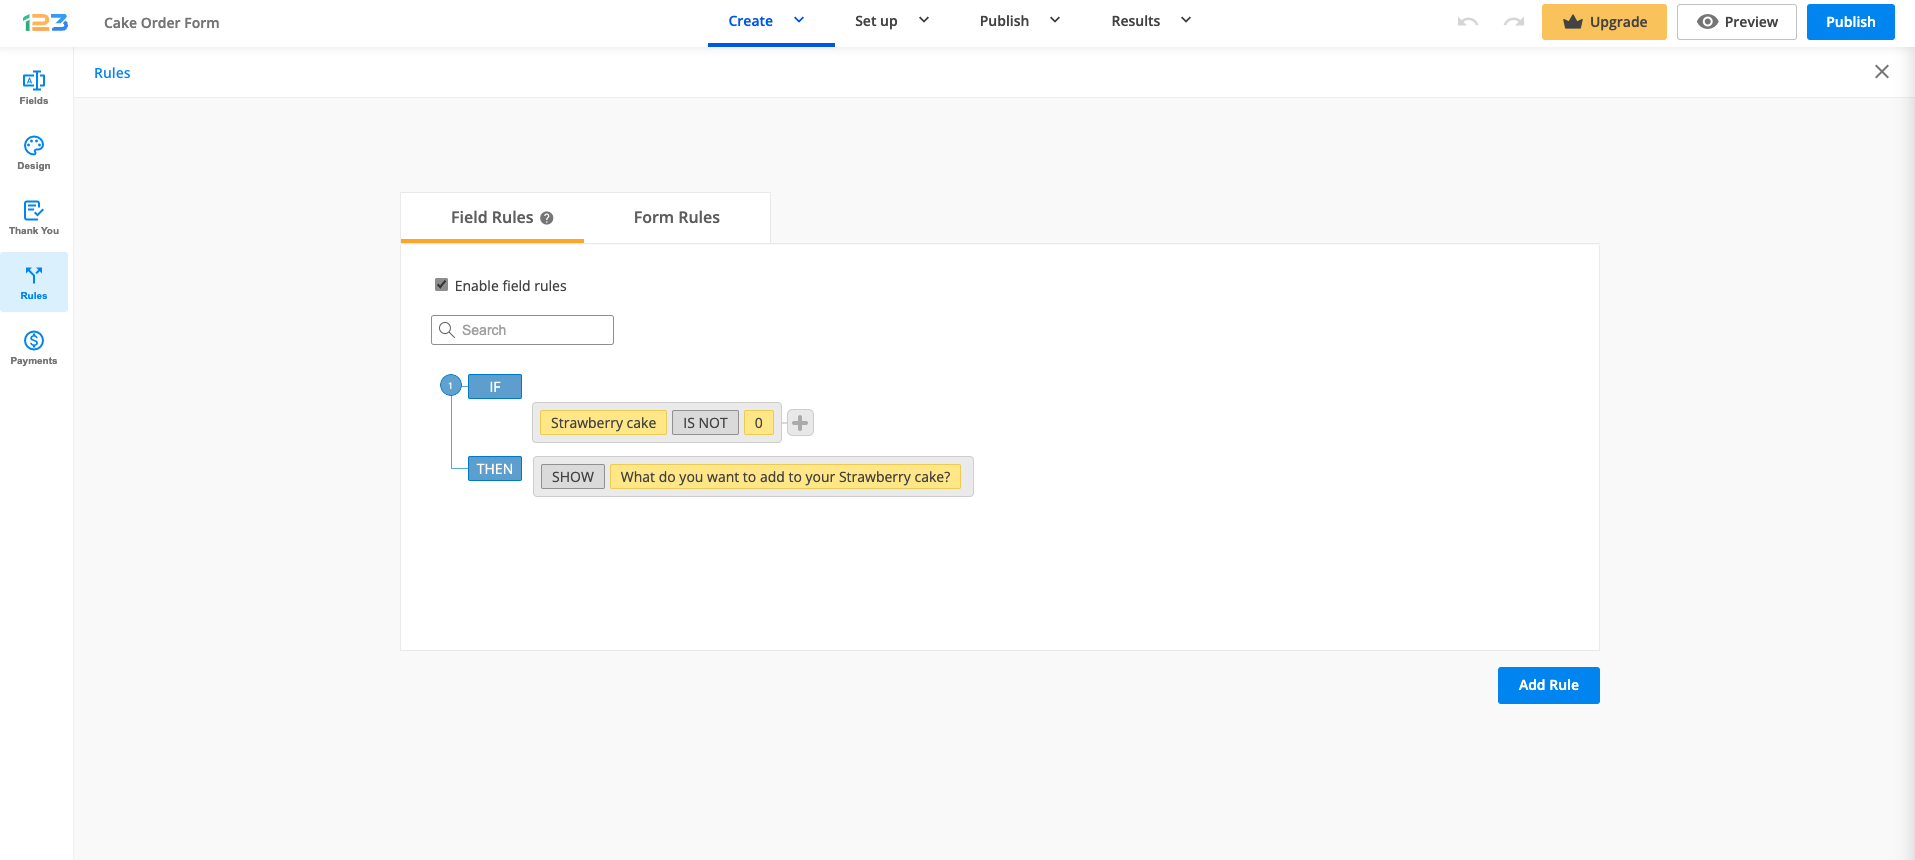
1. Go to Rules → Field Rules and check Enable field rules.
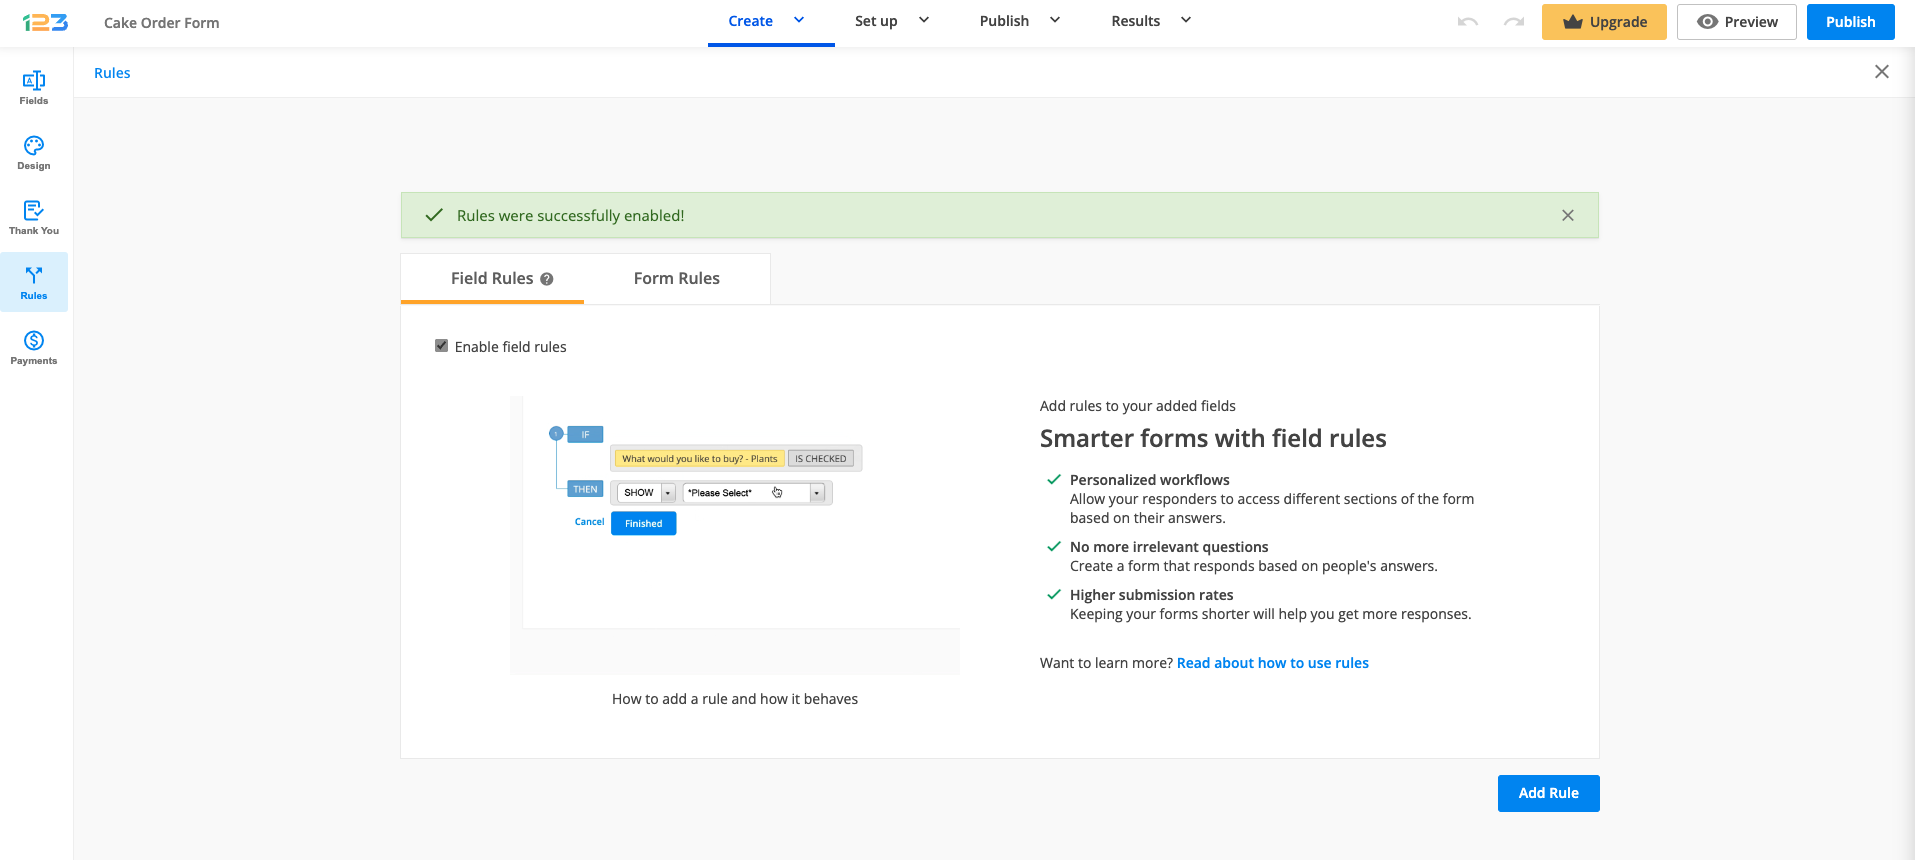
2. Next, add one rule at a time. It’s best that you know precisely how you want to set your rules.
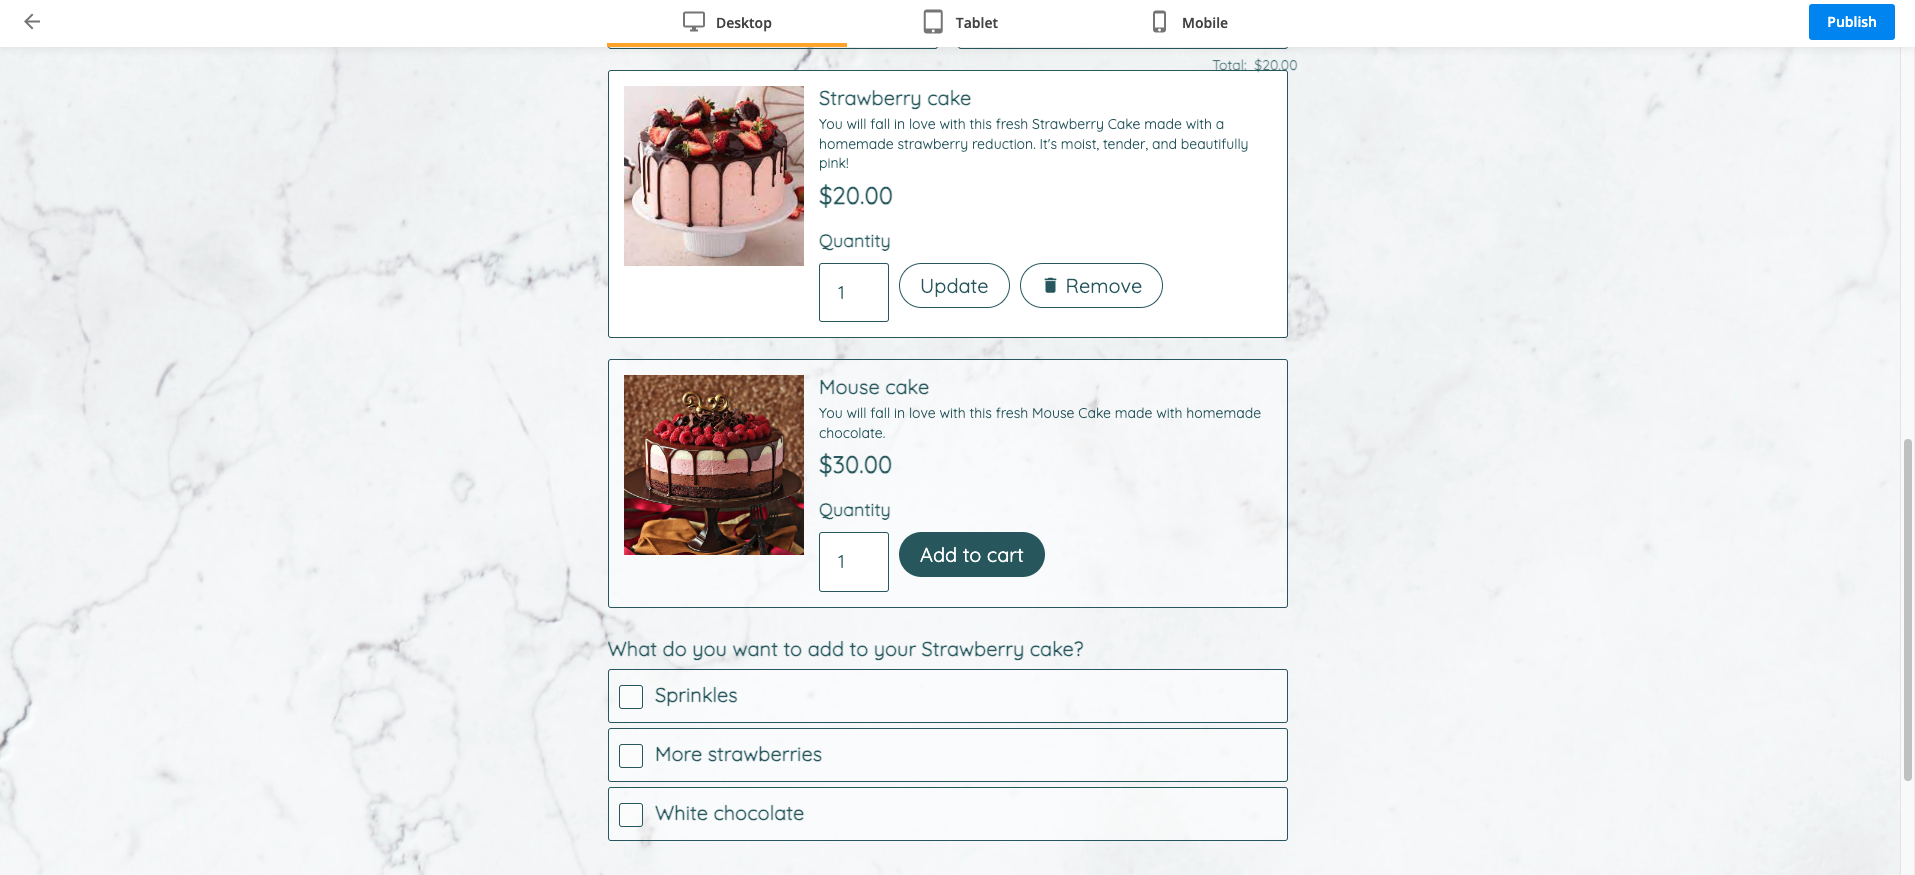
3. We will need to add the first rule that is related to the Strawberry cake. If the strawberry cake is added in the cart by respondents (meaning its value is not 0), then we want to show the question related to the add-ons for the Strawberry cake.
The rule will look like below:
Add a new rule and repeat the same condition, but this time replace strawberry cake with mouse cake in the first dropdown list.
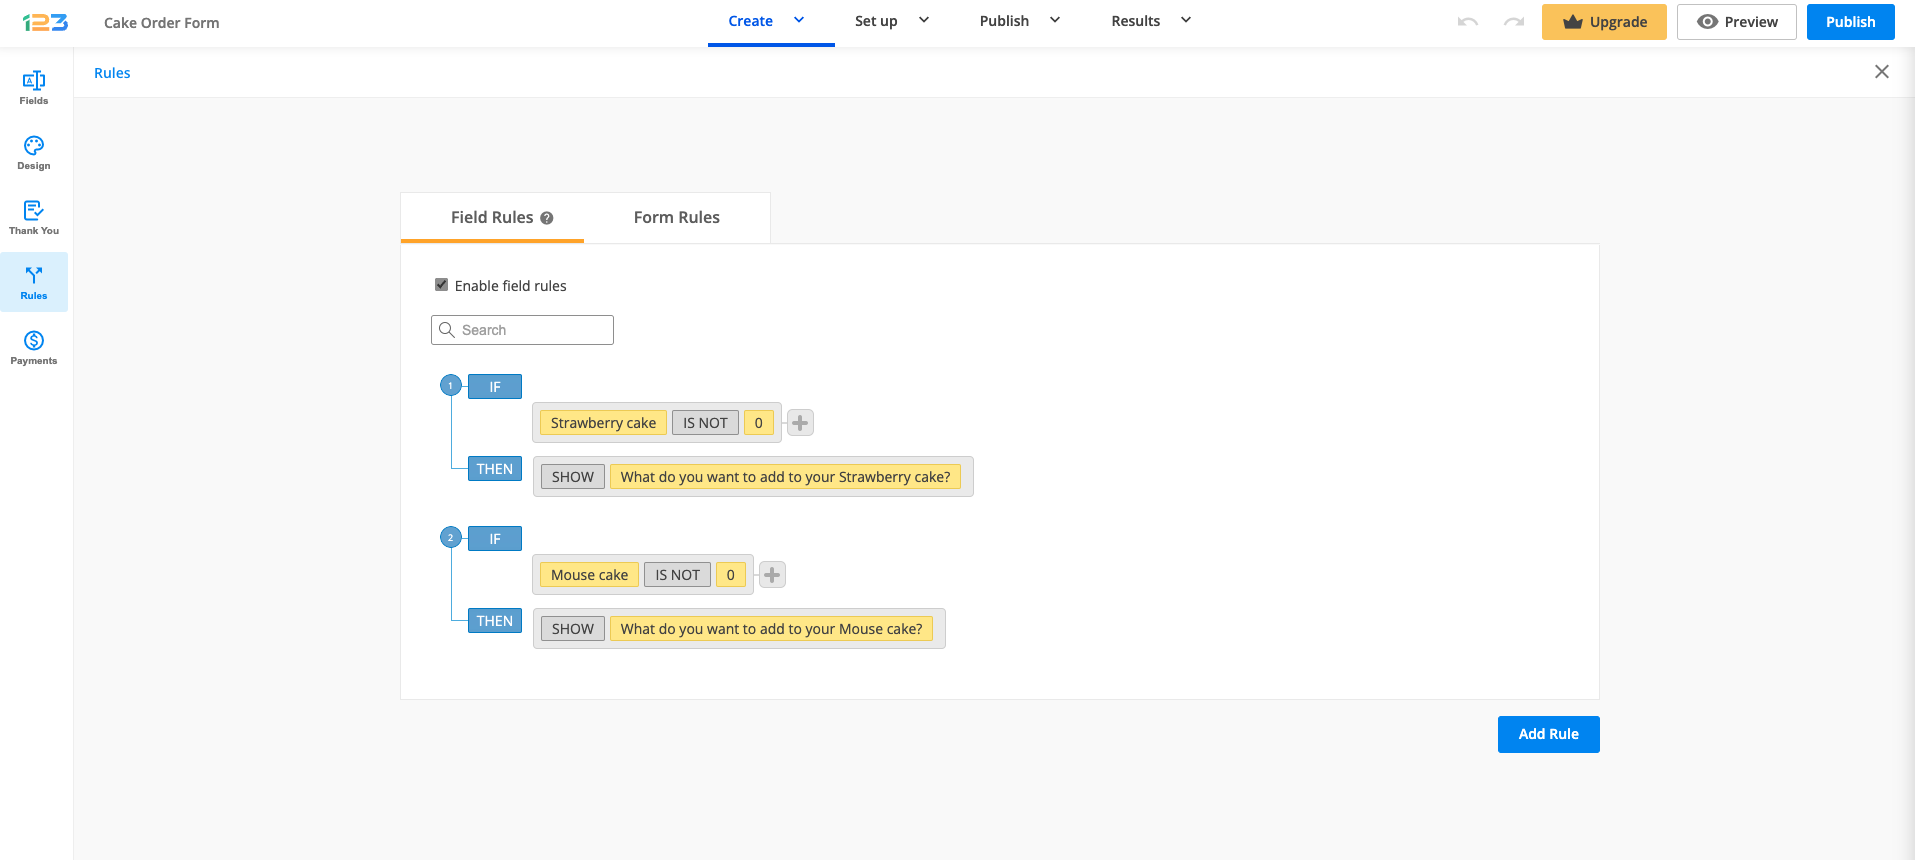
You can assign more conditions to the same rule. To add an extra condition, click on the gray plus sign and a new line will appear. Set up the new condition and press Add when done.
This is how it would look like in Preview mode.
Once the Strawberry cake has been added to the cart, the additional question is displayed according the field rules that we have set up:
Payments
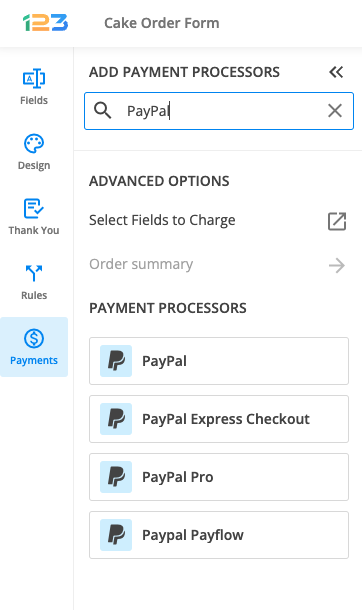
In this section, we have assigned the prices of the form’s products, a coupon box for discounts, and the payment processor. To start with, go to the Form Editor → Payments section and select the payment gateway you want to use.
1. In this demo, we have selected the PayPal payment gateway. You can select and use as many payment gateways as you desire. Learn more about our PayPal order form creator and how it can fit your business model.
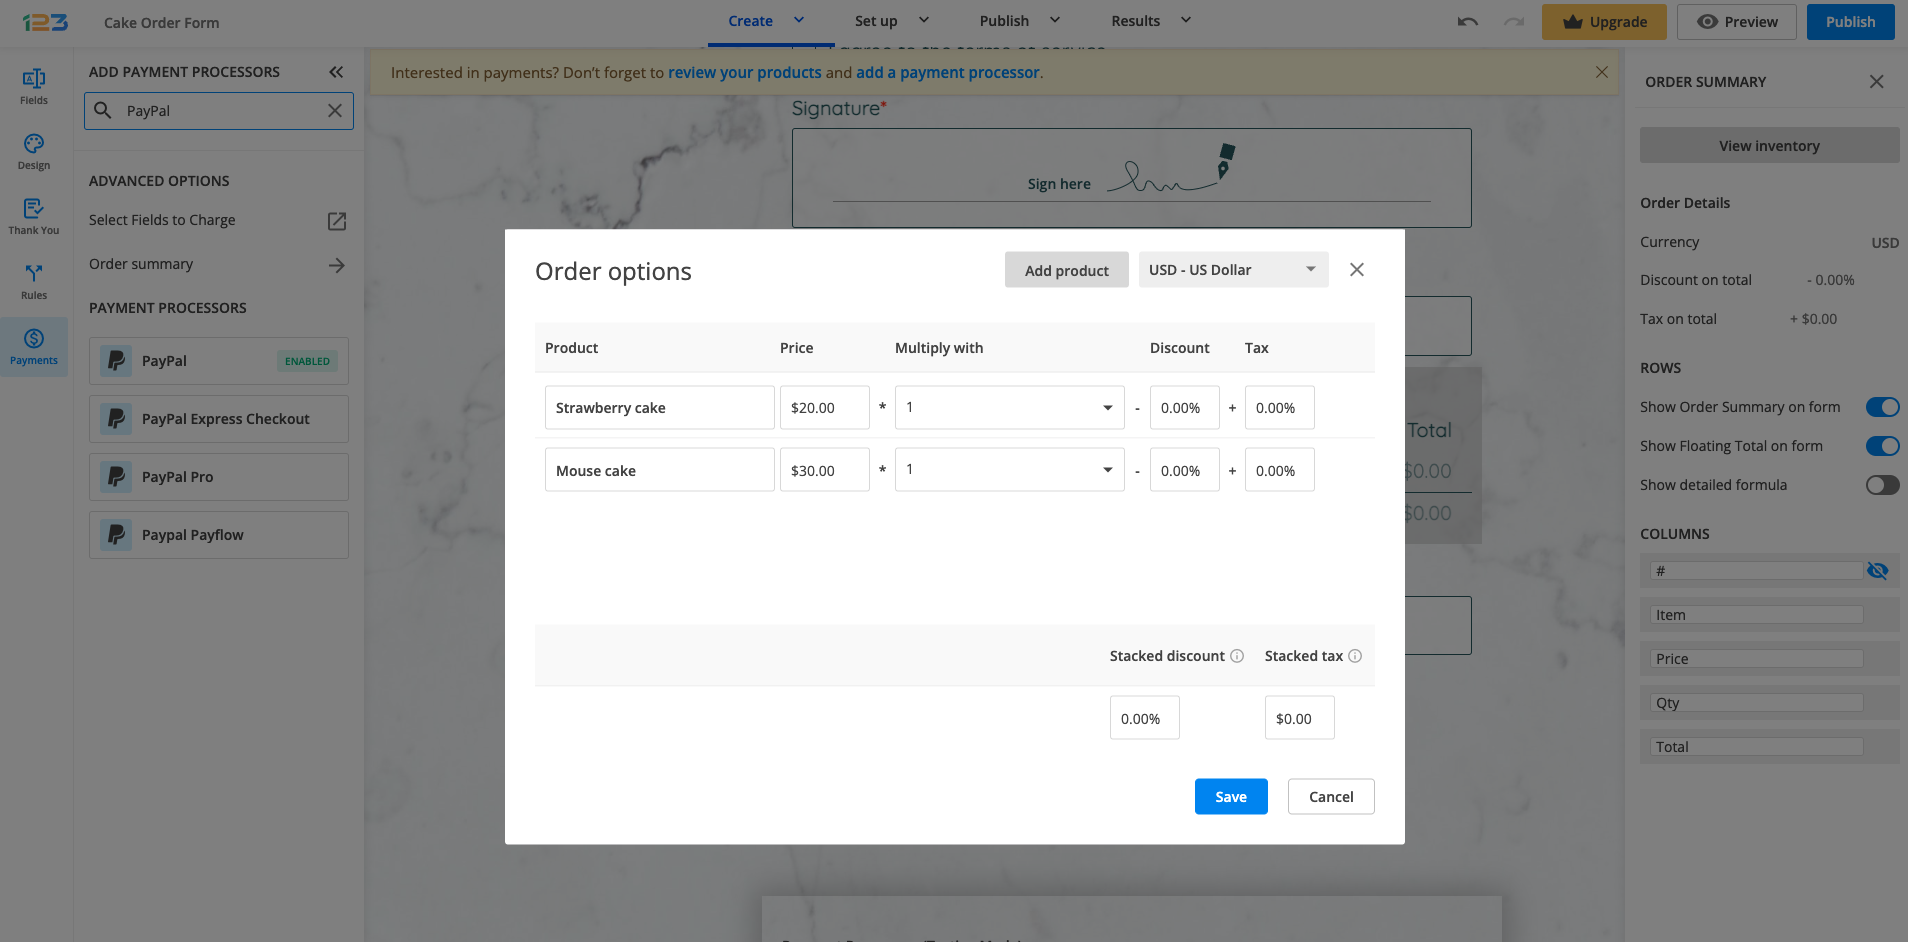
2. On each choice field/product field, we have assigned the necessary prices. You can check this after enabling the payment processor and going to View inventory. All products that have a price assigned will be displayed in this Order options modal.
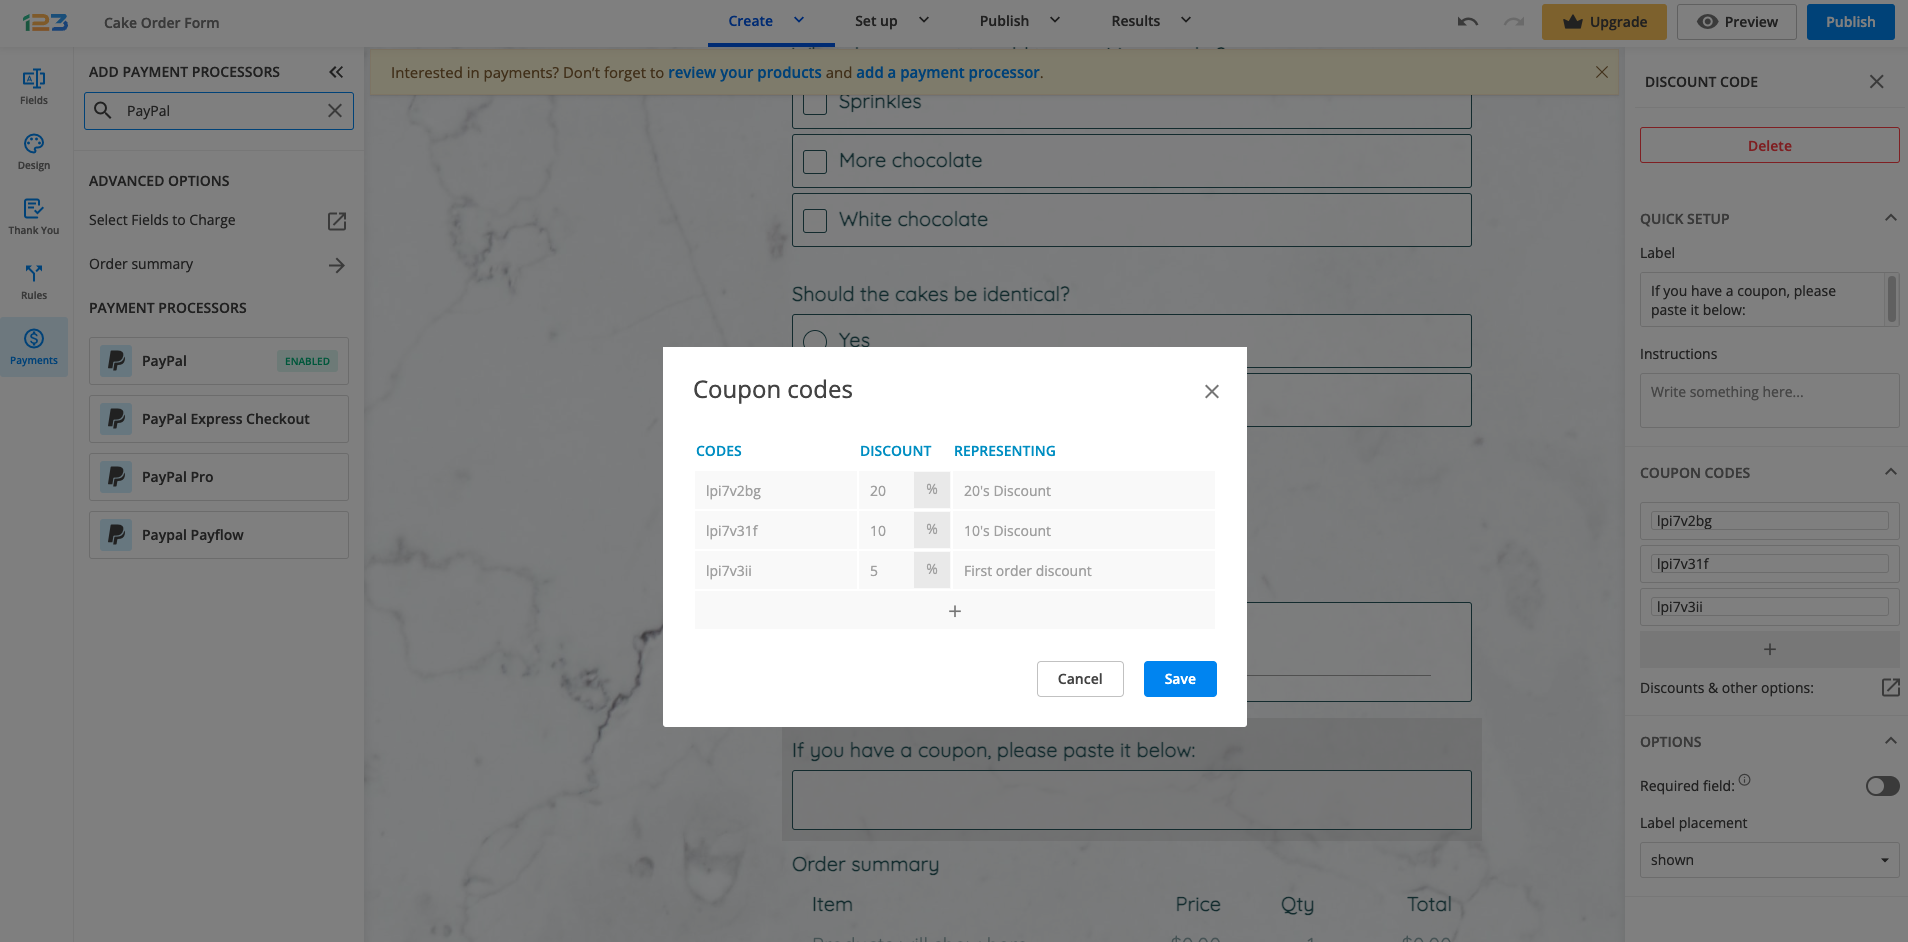
4. You can also add a Discount code field and assign coupon codes to your order form, depending on your needs. We have added three coupon codes to this form. Users can assign one of the codes and receive a discount.
5. In Emails section you can establish an email template that can be sent only after the payment is completed.
And this concludes our guide to creating a complex order form. Pretty easy right? Even though it might seem that a lot of settings are required, with 123FormBuilder, creating complex forms is a piece of cake (that goes pretty well with some tea or coffee).
If you’re running your business on Wix, WordPress, Shopify, or Weebly, this article will guide you on how to create an order form for each one of them using 123FormBuilder.
Related articles
Similar Articles
Frequently Asked Questions
Here is a list of the most frequently asked questions. For more FAQs, please browse through the FAQs page.